How to Properly Install Blind Rivets: Step-by-Step Guide
Blind rivets are essential fasteners used in a variety of applications, including construction, automotive, and manufacturing industries. They provide strong, reliable joints, especially in situations where access is only available from one side of the material. In this guide, we will walk you through the step-by-step process of installing blind rivets properly.
What Are Blind Rivets?
Blind rivets, also known as pop rivets, are tubular fasteners with a mandrel running through the center. They are used to join two materials together when access to the back side of the material is limited or nonexistent. The installation process involves expanding the rivet inside the hole, creating a secure bond.
Tools and Materials Required
Before you begin, gather the following tools and materials:
-
Blind rivets (appropriate size and type for your application)
-
Rivet gun (manual, pneumatic, or battery-operated)
-
Drill and drill bits (matching rivet size)
-
Clamps (to hold materials in place)
-
Safety gear (gloves and safety glasses)
-
Measuring tape and marker
Step-by-Step Installation Process
Step 1: Select the Right Rivet
Choose a blind rivet that matches the thickness and type of materials you are joining. Rivets come in various sizes, materials (aluminum, steel, stainless steel, etc.), and head types (domed, countersunk, etc.).
Step 2: Mark and Drill the Hole
Use a measuring tape and marker to determine where the rivet will be placed. Drill a hole slightly larger than the rivet diameter to ensure a snug fit. Make sure both materials align properly before drilling.
Step 3: Insert the Rivet
Place the rivet into the drilled hole, ensuring the head is flush against the surface. If necessary, use clamps to hold the materials tightly together.
Step 4: Use the Rivet Gun
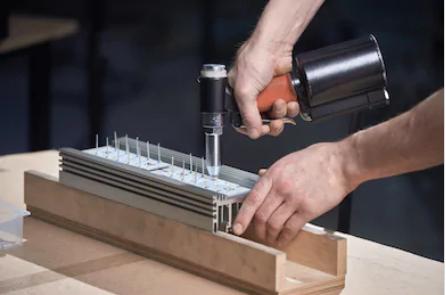
Insert the rivet’s mandrel into the nosepiece of the rivet gun. Squeeze the gun’s handle (or activate the trigger if using a pneumatic or battery-operated gun) to pull the mandrel. This will expand the rivet, securing the materials together.
Step 5: Remove the Mandrel
Once the rivet is fully expanded, the mandrel will snap off automatically. Discard the broken mandrel and check the rivet to ensure it is securely fastened.
Step 6: Inspect the Installation
Examine the rivet to make sure it is tight and flush against the material surface. If the rivet is loose, consider using a larger size or re-drilling the hole for a better fit.
Tips for Successful Rivet Installation
-
Always use the correct rivet size and material for your application.
-
Ensure the drilled hole is clean and free of debris for a secure fit.
-
Use the appropriate rivet gun to match the rivet size and type.
-
Practice on scrap material before working on the final project.
Conclusion
Installing blind rivets is a straightforward process that ensures strong and durable connections. By following this step-by-step guide, you can achieve professional results in various applications. Whether you are working on a DIY project or industrial assembly, blind rivets provide a reliable fastening solution.
